ManicTime Server can now run on Linux and Mac as well. You can download the server from our
download page.
To install it, follow our
installation guide.
You can also run ManicTime Server in Docker, you can find the Docker image on
Docker Hub.
Each ManicTime can now also send screenshots to the server.
Settings
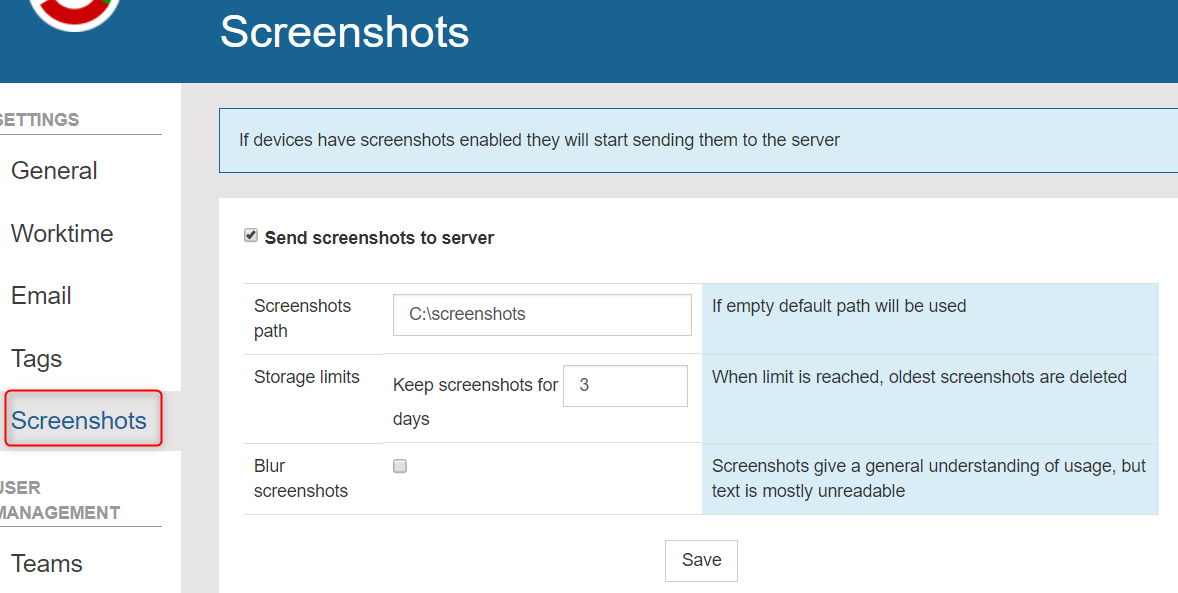
To setup screenshots on the server, first go to Administration -> Screenshot settings. Enable screenshots and set the folder where
they should be saved. If you have a lot of users, choose a drive with a lot of free disk space.
|
|
Server screenshot settings
|
You can also choose to have the screenshots blurred. If you check this, screenshots will be blurred before ManicTime sends them to the server.
The idea of blurred screenshot is that text is unreadable, but you still have a sense of what screenshot represents.
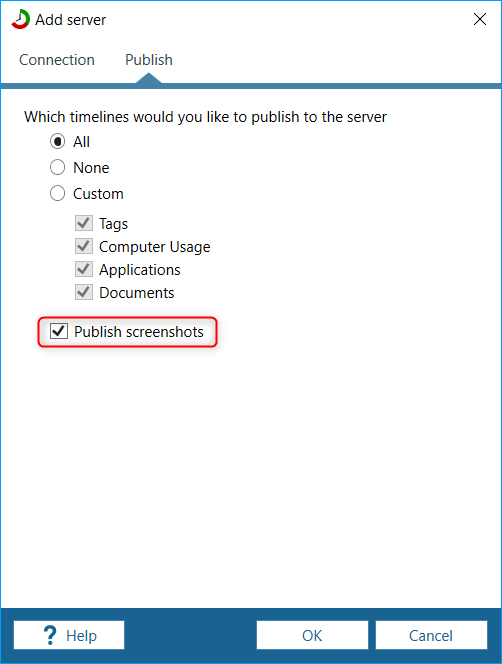
Once you are done with the settings, you also have to configure the client to start sending screenshots to the server.
On ManicTime client (v4.1 or later), go to Edit server, Publish tab and check Publish screenshots.
|
|
Configure ManicTime to send screenshots to the server
|
If you deploy ManicTime via active directory, then create a new deployment file in Administration -> Create deployment file and change it so that the clients will send screenshots.
Usage
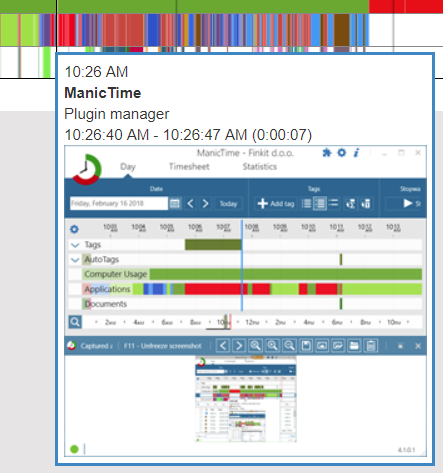
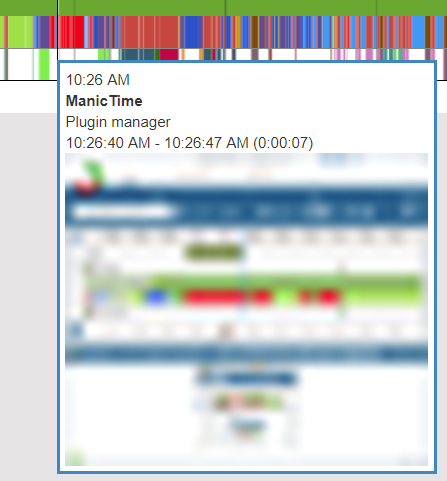
You can view the screenshots on Personal -> Day view or on Reports -> Timelines. If you mouse over the timelines, screenshot will show up in the tooltip.
|
|
|
Screenshot in tooltip
|
Screenshot in tooltip - blurred
|
You can also do something with the screenshots yourself, all the images are now on the server in the folder you specified.
Disk usage
In Administration -> Diagnostics, you can see how much disk space is used by screenshots.
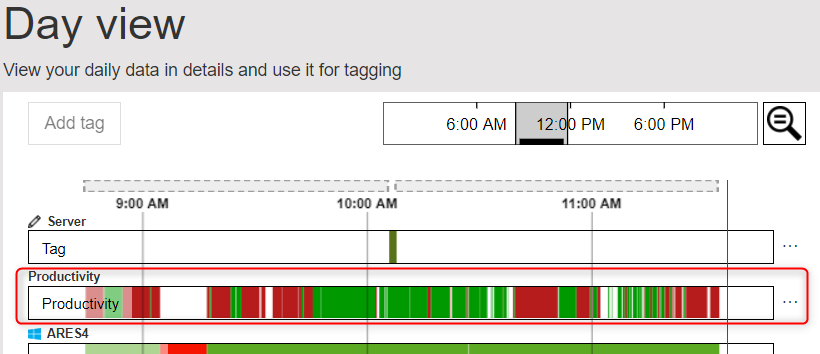
If you have productivity set in Reports -> Productivity, then a new Productivity timeline will show up on Personal, Day view.
Productivity timeline shows productive time (green) and unproductive time (red). Neutral or un-assigned time is not displayed (white).
|
|
Personal productivity timeline
|
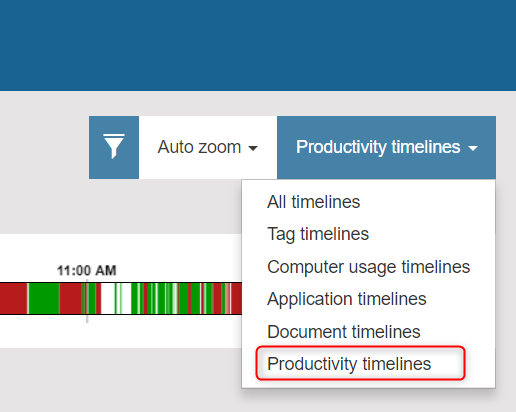
Administrators can also see productivity timeline for all users on the server. To see productivity timelines for all users, go to
Reports -> Timelines and on the top right side choose to display Productivity timelines.
|
|
Productivity timelines for all users on the server
|