ManicTime v2 changes
What's new in this version:
- Server version (Professional edition)
- TimeSheet (Professional edition)
- Autotagging (Professional edition)
- Improvements around tag notes
- Google and Outlook calendar updates
- Custom timeline update
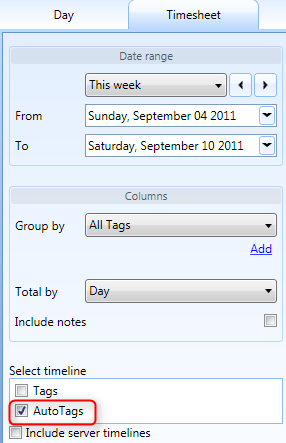
TimeSheet (Professional edition)
In ManicTime tags are used to track work. In previous versions you could use statistics to get some of the tag data, but it was not ideal for some tasks. TimeSheet is a view optimized just for tags, so hopefully from now on generating different work reports like weekly timesheet will be much easier.Lets look at how it works. For example lets say these are my tags:
| Date | Tag | Duration |
| Aug 22 |
Project 1, Design Note: Home page design for www.projectone.com |
4h |
|
Project 1, Testing Note: Testing server connection |
4h | |
| Aug 23 |
Project 1, Testing Note: Testing server connection |
4h |
|
Project 2, Design Note: Application UI design |
4h | |
| Aug 24 |
Project 3, Meeting Note: Discussing integration with their current environment |
4h |
|
Project 2, Design Note: Application UI design |
4h | |
| Aug 25 |
Project 3, Meeting Note: Discussing UI |
8h |
| Aug 26 |
Project 1, Testing Note: Testing compatibility with their environment |
8h |

|
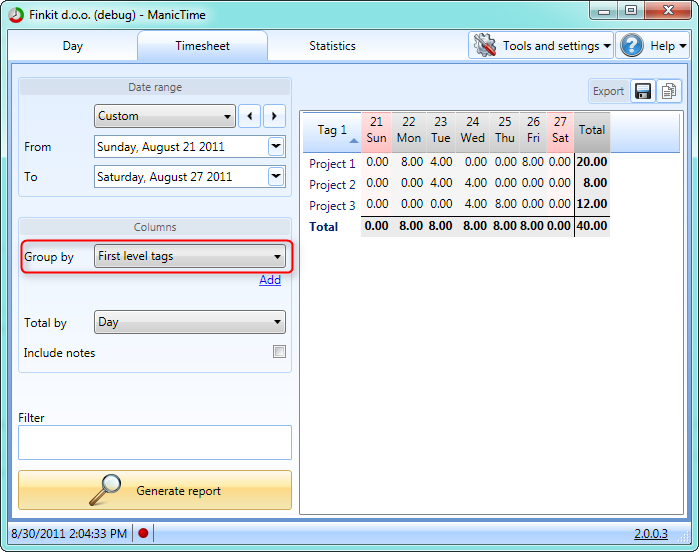
| Timesheet - default view |
From this view I can clearly see that I worked on Project 1, Testing on Monday, Tuesday and Friday, a total of 16hrs.
How about if I just want to see on which projects I was working on, not activities. In the sample data, first tags were always projects, so in the field Group by I can now choose First level tags instead of All tags. This will produce the following output:
|
| Timesheet - First level tags |
Some of you may use tag notes, if you do timesheet also allows you to group by notes. I'll leave first grouping by First level tags, and add another grouping Notes.
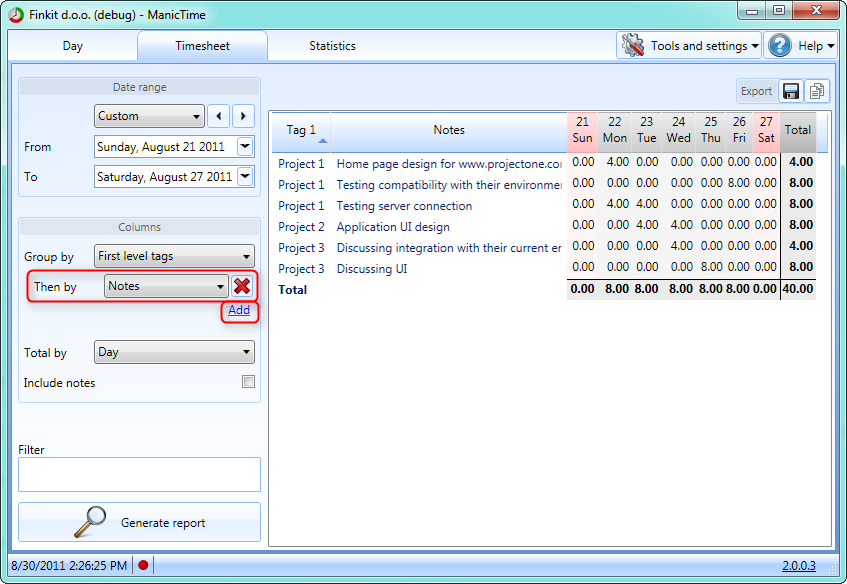
|
| Timesheet - Group by notes |
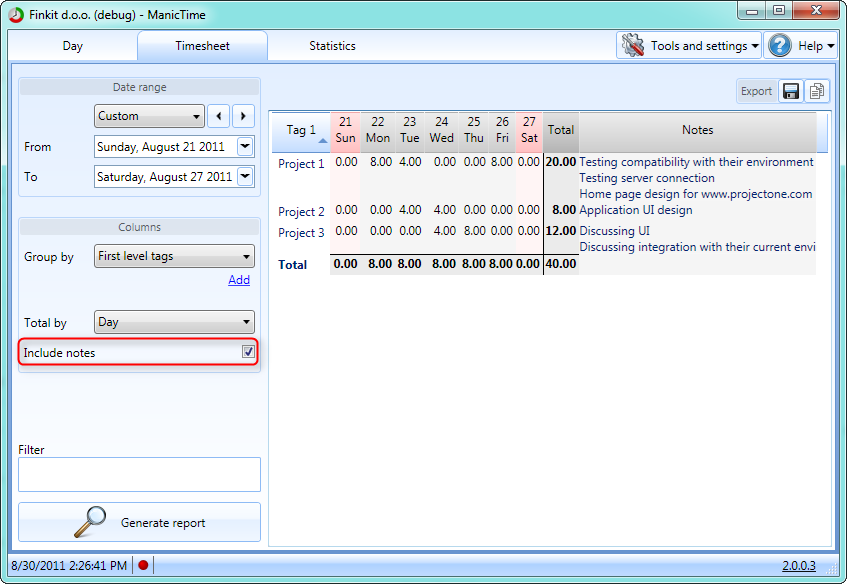
Notice that when you group by notes you get all the sums, just as if notes were tags. If you just want to show notes, but not affect summary then check Include notes. So with Include notes you wont see summary for each, instead notes will just be appended.
|
| Timesheet - Include notes |
More information about TimeSheet
Autotagging
Since the first release of ManicTime there has been a lot of requests for autotagging. By autotagging I mean something which would allow tagging by rules, such as tag 'facebook.com' as Surfing, or tag Outlook as Email...To start using Autotagging we first need to add Autotag timeline. Go to Timeline editor -> Add timeline and choose Autotag type.
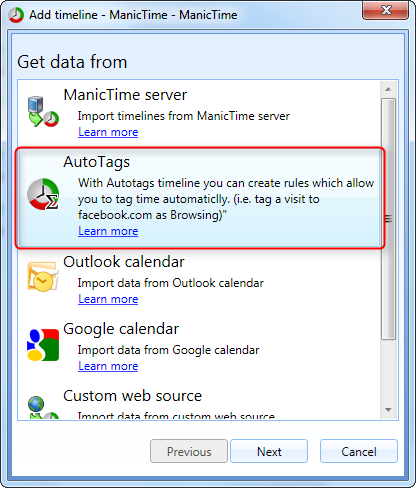
|
| Autotags - Add autotag timeline |
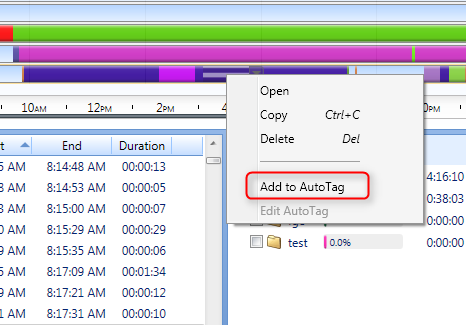
Now we are ready to add some rules. Right click on any activity on other timelines and click on Add to autotag command.
|
| Autotags - Add to autotag command |
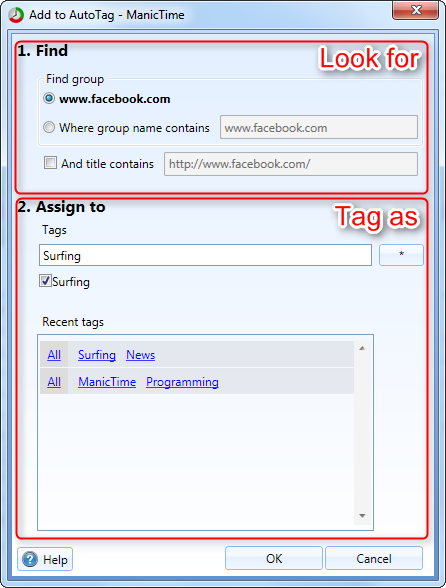
Top part of the Add to autotag window shows the rule, so what ManicTime will look for. Bottom part is the tag to which you want this rule assigned. Lets say I want to tag 'facebook.com' as 'Surfing'.
|
| Autotags - Add to autotag window |
Once I click Ok, autotag timeline will start to fill up. You can make any number of rules. A few example rules:
'cnn.com' -> 'Surfing, News'
'fox.com' -> 'Surfing, News'
'Visual Studio' and title contains 'ManicTime' -> 'ManicTime, Programming'
'Outlook' -> 'Email' ...
Difference between tags and autotags
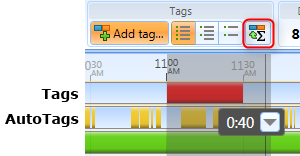
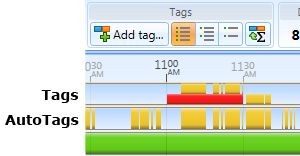
While tags are always created manually, autotags are calculated for each day separately. So when the rules change so will the autotags. If you are doing any kind of billing you usually want your history to remain the same. With autotags, summary can be completely different six months from now. That's why we included an option to copy autotags to tags. When you copy autotags to tags, tags are created just as if you would create them by hand.If you want to copy all autotags for the day to tags timeline, click on 'Copy autotags to tags' button. If you want to transfer only some sections, make a selection before you click on the button (in the image below, autotags will be applied only to the selected section).
|
|
|
| Autotags - Before copy | Autotags - After copy |
When copying autotags, there is a possibility that the same time was already tagged. In the image below, I first manually created a tag, then selected the same time and clicked on copy autotags to tags.
|
| Part of the selected time is already tagged |
|
|
| Autotags - Copy conflict |
Result of all three choices can be seen below.
| Double tag | Tag only untagged time | Overwrite existing tags |
|
|

|
The new TimeSheet feature also allows you to create reports based on autotags. On the Timesheet, choose Autotags timeline as a source timeline.
|
| Autotag reports |
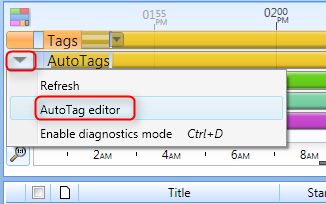
You can edit autotags and tweak some more advanced options in Autotags editor
|
| Autotags editor |
More information about Autotagging
Improvements around tag notes
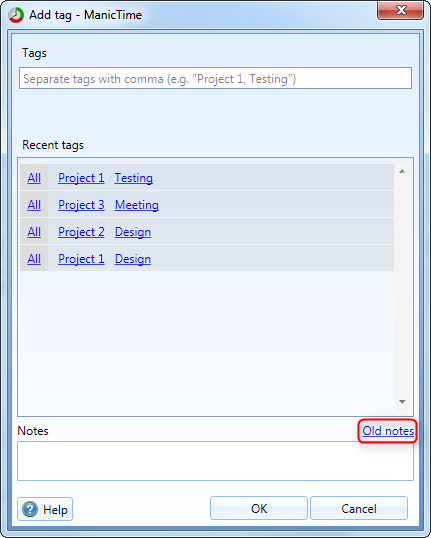
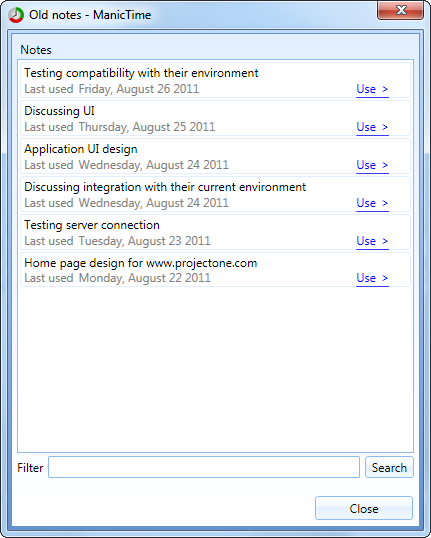
When we added support for notes in TimeSheet, we realized that we need a way to reuse a note when tagging. Previously there was no way to reuse a tag note. Now when you open Add tag dialog, you can get a list of previous notes by clicking on Old notes link.
|
| Timesheet - Include notes |
Old notes will be ordered from the most recently used down. Double click a note or click on Use link to copy the text to Note field.
|
| Timesheet - Include notes |
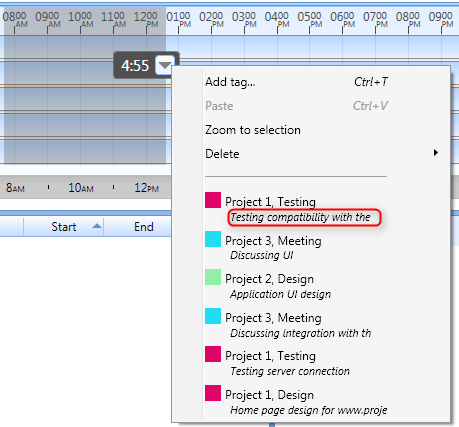
Last 10 recent tags shown in context menu, now also take note into account.
|
| Recent tags context menu |
Google and Outlook calendar updates
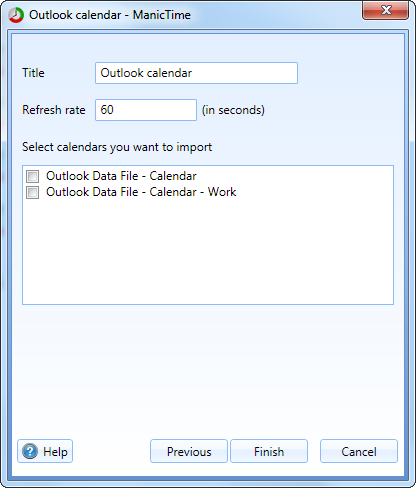
If you have more than one calendar defined in Outlook, you can now choose which one to import into ManicTime.
|
| Choose outlook calendar to import |
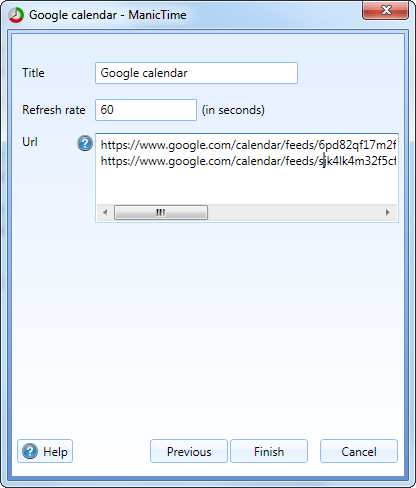
Similarly if you have more than one Google calendar you can now add them on the same timeline. Put each Google Calendar URL on separate line.
|
| Import mutiple Google calendars on the same timeline |
Custom timeline update
Custom timeline can also have notes. Add node AdditionalData to your XML.Sample XML